Take small bites, chew long and eat slow, but this time it is obeyed – Splitting message in Node-RED containing a JSON object
This sounds trivial – and it is. When you know how to do it 🙂 There’s an example on the Node-RED homepage splitting a message generated from CSV, but this isnt the case here.
I somehow did miss the point – if there is one made in the documentation – of how to split a message containing specific data and split it up into separate ones with their own topic.
A single message can have multiple outputs.
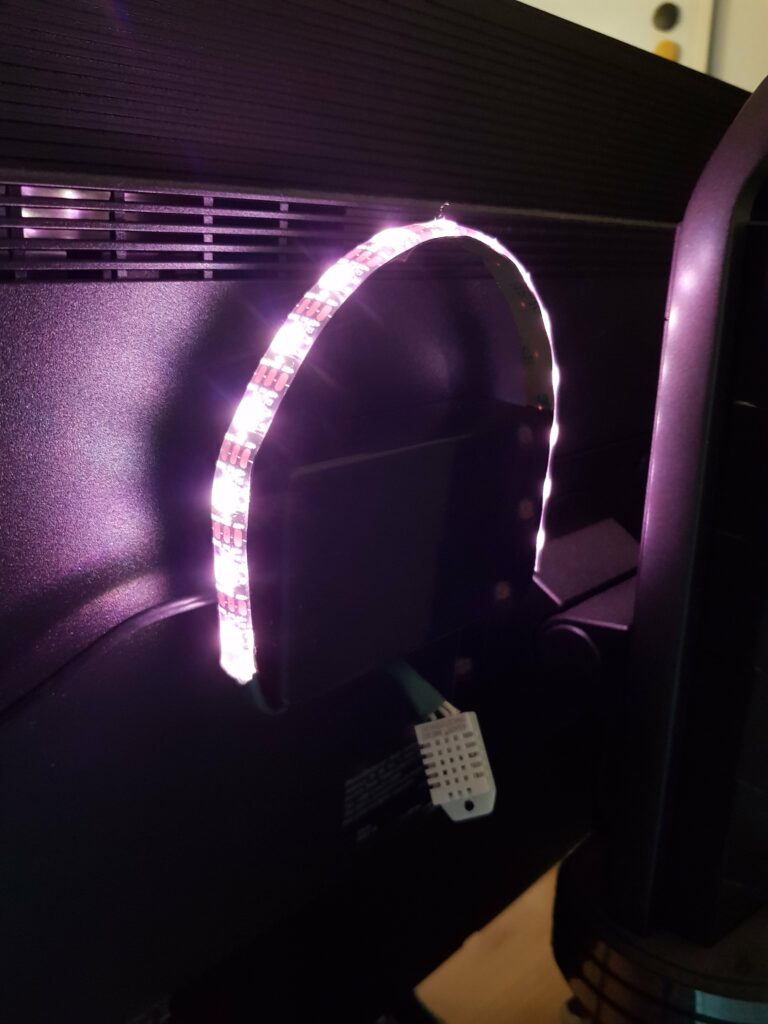
Let’s pretend we have a IoT sensor measuring temperature and humidity and sends it periodically to our MQTT server containing both values in a JSON object like in the following example. We want to separate those values and send them to their own topics. This can make e.g. setting up your MQTT Dashboard app on the smartphone much easier as you can skip the JSON extraction there.
"msg": {
    "topic": "bedroom/temp_hum",
    "payload": {
        "temp": 22.5,
        "hum": 49.1
    }
}
The goal of this tutorial is to create a flow in Node-RED which builds the following messages with a single value as payload and publishes them at their separate topic:
"msg": {
"topic": "bedroom/temp",
"payload": 22.5
}
"msg": {
"topic": "bedroom/hum",
"payload": 49.1
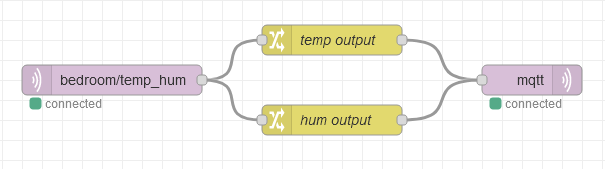
}First read the published messages on the topic with a “mqtt in” node, then add two “change” nodes and connect them separately to it. Add an “mqtt out” node and connect the two change nodes to it. Your result should look like this:
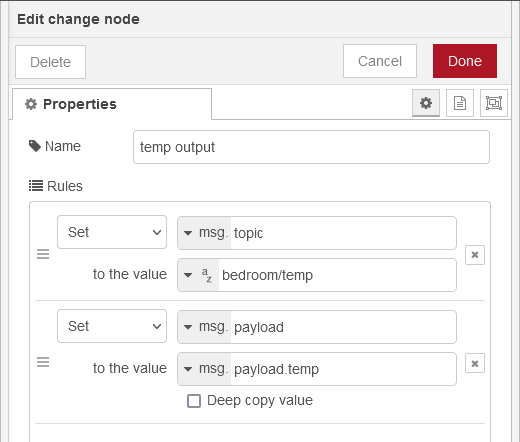
Next step is to configure the change nodes. Each of them takes in the same incoming message and creates an output. In the nodes a static topic will be set and the msg.payload will be changed to the previous msg.temp / msg.hum thereby overwriting the JSON with the single value.

With those change nodes configured and connected the work is almost done. It remains to publish the newly created messages. That is done by the “mqtt out” node. You just have to set the MQTT broker there as the whole message is already set for publishing.
When setting up flows in Node-RED testing and debugging is REALLY helpful. GO and try out the “debug” node. You can watch output of nodes in real-time in your test environment and also the live environment. Add a node and connect it to the node(s) you want to know the output. Show the debug view by clicking the bug icon in the ipper right corer.
For this example I also created a test flow. The input and output node are replaced by a “inject” and a “debug” node. I could have just connected them to the existing change nodes, but it would have messed up the nice overview of the nodes a bit, so I replaced them.

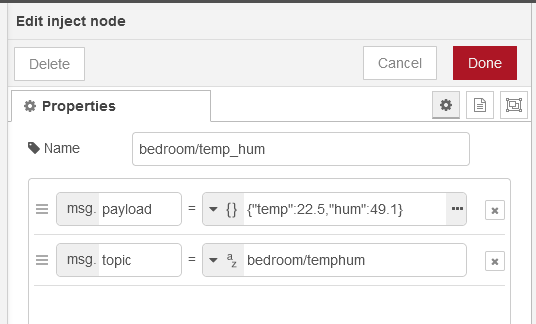
The inject node contains the above mentioned message with the data in a JSON object. It is used as test input as you can simply press the blue button on the left of the “inject” node to send the message into the flow.
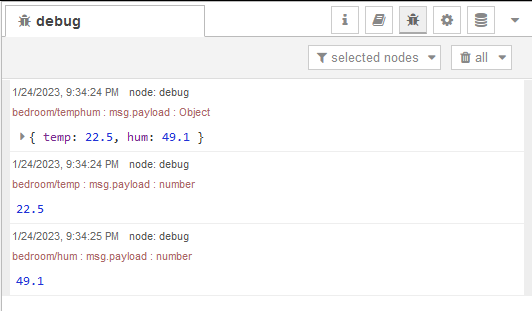
The “debug” node is not configured, just connected. Its default behaviour is to show the content of the msg.payload. The debug view in Node-RED should look like this when the inject button is pressed.