I don’t like grilled cheese – a thresholded IoT (MQTT) DHT22 sensor on with a D1 mini written in MicroPython with circuit diagram, casing and installation
TLDR: An IoT sensor for temperature and humidity sending its values to a local MQTT server. Measuring interval and thresholding easy to configure.
So much to write about a pretty small device and less than 100 lines of code including configuration, prints and comments. Hope you enjoy it! 🙂
I really like building and writing the code for IoT devices, but I also want to minimize the WiFi pollution while having most of the benefits of their connectivity. Multiple of this device will be installed in the house so they have to be reliable and produce as little WiFi traffic as possible. I included a configurable measuring interval and thresholding which is capable of skipping updates until a change threshold for temp or hum is reached or a max count of skipped updates is reached. You can force it to send every update or skip unlimited times when no threshold is exceeded. In the config file below you find my preferred values: measure interval 15 sec, unlimited skipping and thresholds (temp 0.2, hum 0.5). This results in few to no updates when nothing changes, but increased updates when something changes fast (ventilating bedrooms for example).
You will have to flash your D1 with the latest MicroPython image first. You can use Thonny for it as I do.
The configuration and wifi credentials are extracted to avoid changes to the actual code when only configuring it for the individual device.
The code itself consists of the following:
WiFi connectivity: takes your wifi credentials in config.wifi_credentials.py and connects to the wifi if not already connected.
MQTT broker: creates a connection to the specified IP and published the collected data to the topic. The connection to the broker is automatically closed after 5 seconds if unused.
Sensor: Measures the temperature and humidity on the connected DHT22 in an interval. Uses the values specified in the config.config.py file. You can define thresolds for temp and hum. If none of the thresholds is exceeded, the sensor would not send an update but skip it until the values changed sufficiently to exceed them. You can define a max skipped count in tht config and the sensor keeps track of how many times an update was skipped. If the maximum is reached, it would send an update regardless. When setting max skip count to 0 it would never skip and if set to -1 there’s no skipping limit. So choose what you want. I prefer to keep the interval pretty short (15 sec) and unlimited skipping. So when ventilating the bedrooms you will get many updates as the values change a lot and in the night with temp threshold set to 0.2 and hum threshold to 0.5 I get about one update per hour.
The run-loop: Is error prone due to try-except and doesn’t stop when something went wrong, but also logs to the console. Measures the current temp and hum and determines if it should send an update. If so, WiFi is connected if needed and then the values are packed into a JSON string and publihed to the MQTT broker.
I am using the self.id (genarated from the MAC address) in Node-RED to map the device to a name / location and rebroadcast the processed and enriched message to its own topic.
The topic ‘sensor/raw’ in the config is just the general topic I use for all sensors. If the MAC is mapped to ‘office’, temperature and humidity of this room would be published to ‘office/temp’ and ‘office/hum’. This makes configuring apps on your mobile a little easier and you won’t have to extract from an JSON object. It also a nice decoupling from the used device and the more complex data that is processed in the background. For the client everything stay the same and the device could change and the data processing in the background. If the same values still are published at the used topic everything is fine.
import dht
from machine import Pin
from time import sleep
import config.config as cfg
import config.wifi_credentials as cred
import network
import ubinascii
import json as j
from umqtt.robust import MQTTClient

class IoTTempHumSensorThresholded:

    def __init__(self):
        self.temp = None
        self.hum = None
        self.prev_temp = None
        self.prev_hum = None
        self.temp_hum_sensor = dht.DHT22(Pin(cfg.SENSOR_PIN_DHT, Pin.IN))
        self.wifi = network.WLAN(network.STA_IF)
        self.id = ubinascii.hexlify(self.wifi.config('mac'), ":").decode().upper()
        self.publishes_skipped = 0
        print(f'id = {self.id}')

    def connect_to_wifi(self):
        print('connecting to wifi')
        self.wifi.active(True)
        self.wifi.connect(cred.WIFI_SSID, cred.WIFI_PASSWORD)
        while not self.wifi.isconnected():
            sleep(0.3)
        print(f'connected to wifi {self.wifi.ifconfig()}')

    def read_sensors(self):
        self.temp_hum_sensor.measure()
        self.temp = self.temp_hum_sensor.temperature()
        self.hum = self.temp_hum_sensor.humidity()

    def should_publish(self) -> bool:
        will_publish = True # default - will be changed if no threshold exceeded
        if self.prev_temp is None or self.prev_hum is None:
            print('No previous value')
        elif cfg.MAX_PUBLISH_SKIPS == 0:
            pass
        elif self.max_skipped():
            print('Max times skipped reached')
        elif abs(self.temp - self.prev_temp) >= cfg.TEMP_THRESHOLD:
            print('Temperature change threshold exceeded')
        elif abs(self.hum - self.prev_hum) >= cfg.HUM_THRESHOLD:
            print('Humidity change threshold exceeded')
        else:
            print(f'Skipping update: Temp: {self.temp} Hum: {self.hum}')
            will_publish = False
        self.publishes_skipped = 0 if will_publish else self.publishes_skipped + 1
        return will_publish

    def max_skipped(self) -> bool:
        return False if cfg.MAX_PUBLISH_SKIPS == -1 else self.publishes_skipped > cfg.MAX_PUBLISH_SKIPS

    def update_previous_values(self) -> None:
        self.prev_temp = self.temp
        self.prev_hum = self.hum

    def publish(self):
        mqtt_client = MQTTClient(self.id, cfg.MQTT_SERVER, keepalive=5)
        mqtt_client.connect()
        data = j.dumps({'temp': self.temp, 'hum': self.hum, 'id': self.id})
        mqtt_client.publish(cfg.SENSOR_TOPIC, data)
        print(f"====> Published: Temp: {self.temp} Hum: {self.hum}")

    def run(self):
        while True:
            try:
                self.read_sensors()
                if(self.should_publish()):
                    if not self.wifi.isconnected():
                        self.connect_to_wifi()
                    else:
                        self.update_previous_values()
                        self.publish()
            except Exception as e:
                print(f"Error when reading sensors or publishing - continuing\n{e}")
            sleep(cfg.SENSOR_INTERVAL)

if __name__ == "__main__":
    IoTTempHumSensorThresholded().run()
SENSOR_PIN_DHT = 14
SENSOR_INTERVAL = 15
TEMP_THRESHOLD = 0.2 # temp change has to be >=
HUM_THRESHOLD = 0.5 # hum change has to be >=
# -1 unlimited skips
# 0 forces to send every time
# >= 1 set the max skip count
MAX_PUBLISH_SKIPS = -1
MQTT_SERVER = '192.168.2.123'
SENSOR_TOPIC = 'sensor/raw'WIFI_SSID = 'YOUR_WIFI_SSID'
WIFI_PWD = 'YOUR_WIFI_PASSWORD'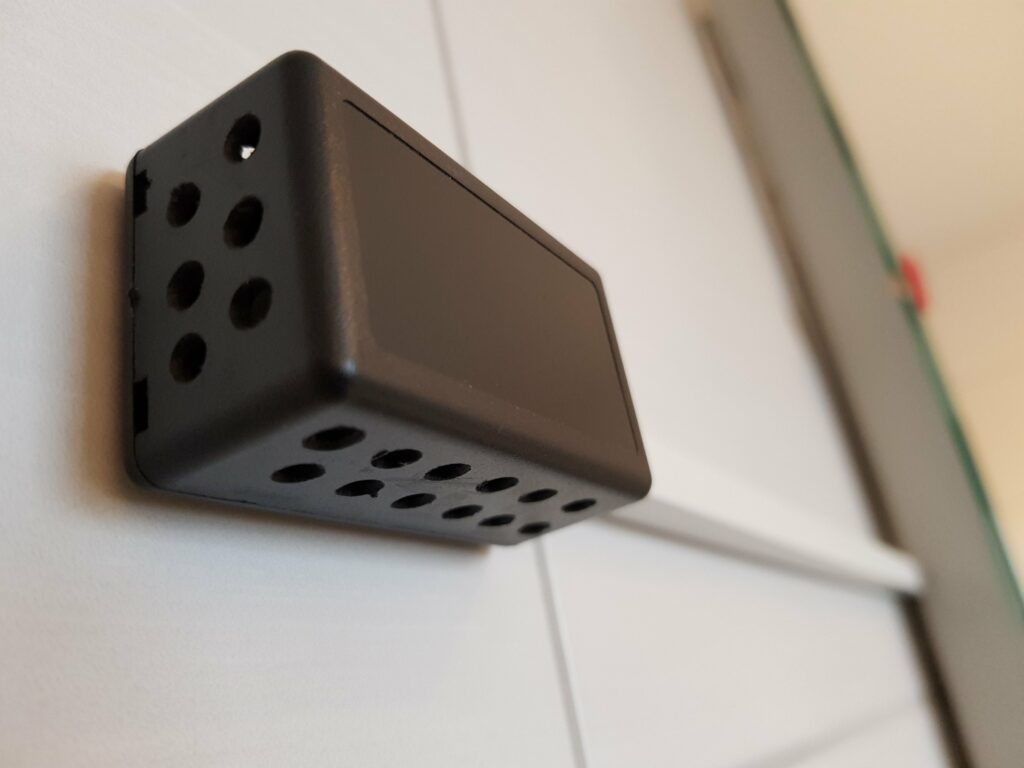
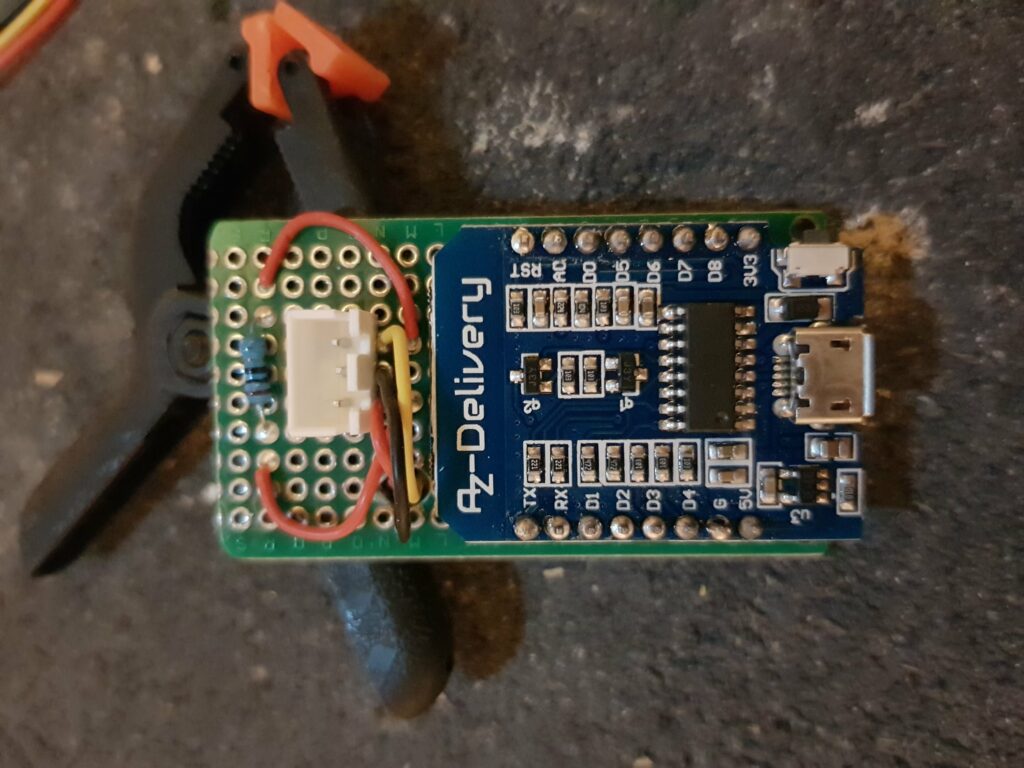
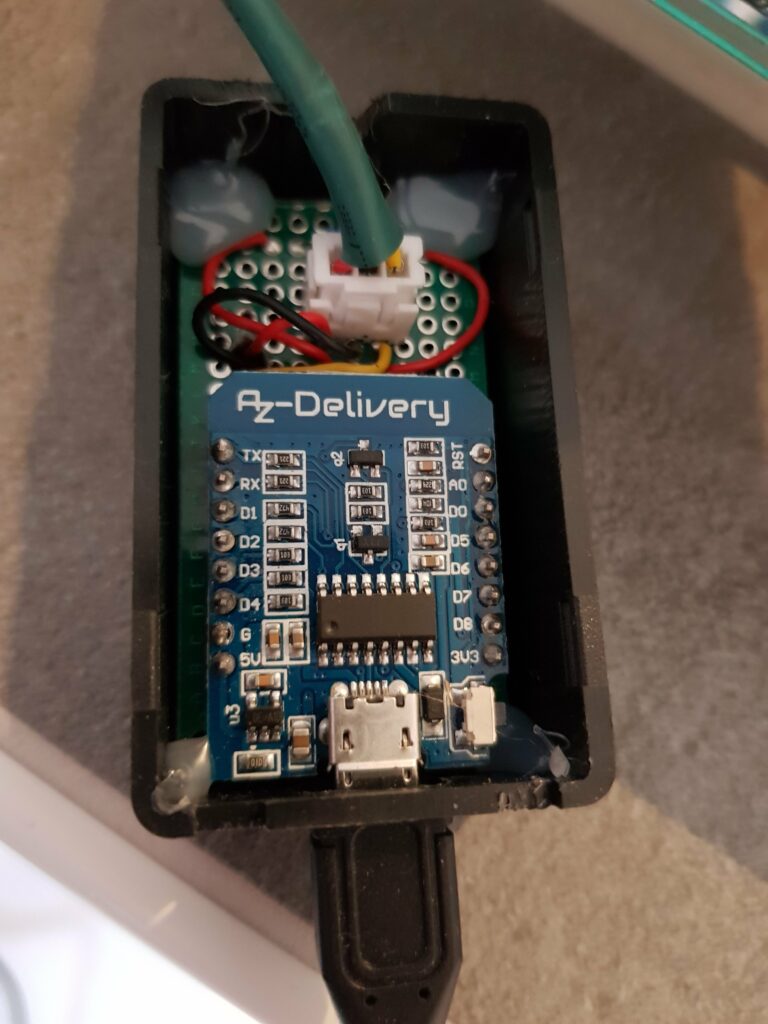
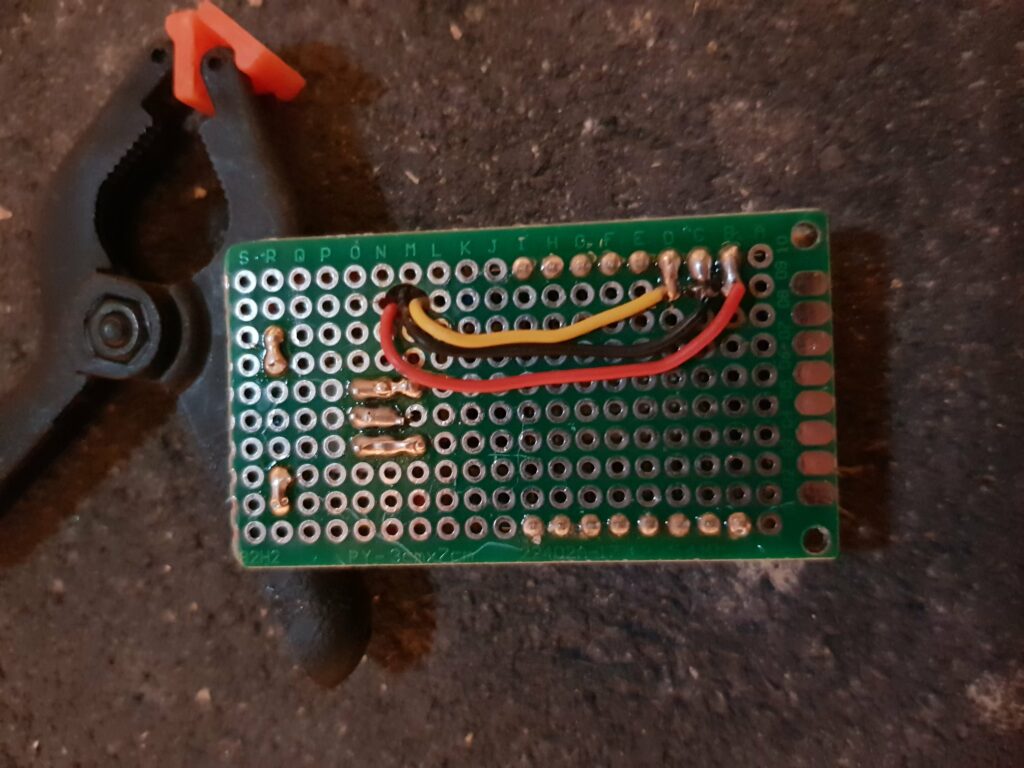
The MCU is soldered on a small breadboard which fitted pretty well in a small case. To make installation and replacement of MCU or sensor easy, I used a 3 pin JST connector. As the sensor is placed outside, I put it into its own case in which I drilled many holes to optimize air circulation to have pretty exact and fast adapting measurment values. The cable is hidden i a cable tunnel and the single wires protected with shrink tubing.
Don’t put the DHT22 in the same case as the MCU as the temperature would be some degrees warmer because of the warmth the D1 generates. It could work if you used separate chambers and close them off nicely. Let me know your ideas!
I placed the sensor at about 1.5 meters height and far away from the windows / close to the entry. This should be the place with most constant experienced temperature – and the thermostats for the floor heating are pretty close, too.
The temperature and humidity readings I get seem pretty exact and realistic as I compared them with conventional temperature sensors.
The question that remains is – WHY?
“It is absolutely no problem to walk some meters and see for yourself you lazy fuck?“
Yeah sure, but do you want to get up again when already in bed and check if you closed the window to the washing room? I prefer to being reminded silently on my wrist band if the temperature in a room dropped below 19°C.
I could check the vlues every five minutes if I was a control freak, but I am not. But I keep forgetting to close the bathroom window a lot and with below zero temperature on the outside and the raising energy costs it is a good thing to not have your heating contribute to the global one and drain the bank account more than necessary.
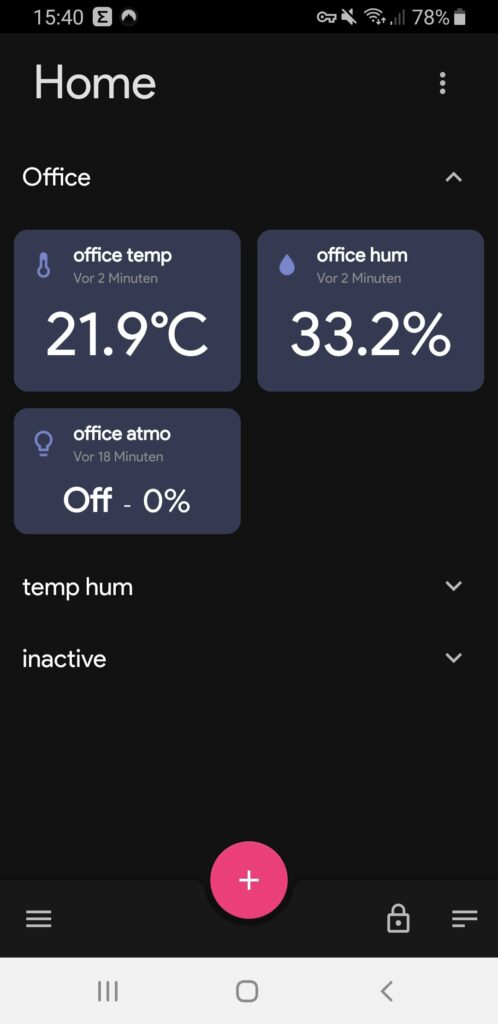
As mobile app I use MQTT-Dashboard, which is free and pretty good. I setup some tiles with temp/hum and a light control for my LED atmo light behind the monitor.
I changed the data pin to D5 (GPIO 14), because the previously chosen D4 (GPIO 2) is connected to the onboard LED and I got a blink every time the sensor measured. Why did you then choose D4 in the first place? Because I was lazy and forgot to take a look at RandomNerdTutorials and chose my pin wisely.

Have fun building your own!