A tiny multitalent: Raspberry Pico Pinout
The pinout of Pi Pico and Pico W are the same. Just the onboard LED has changed. See below.
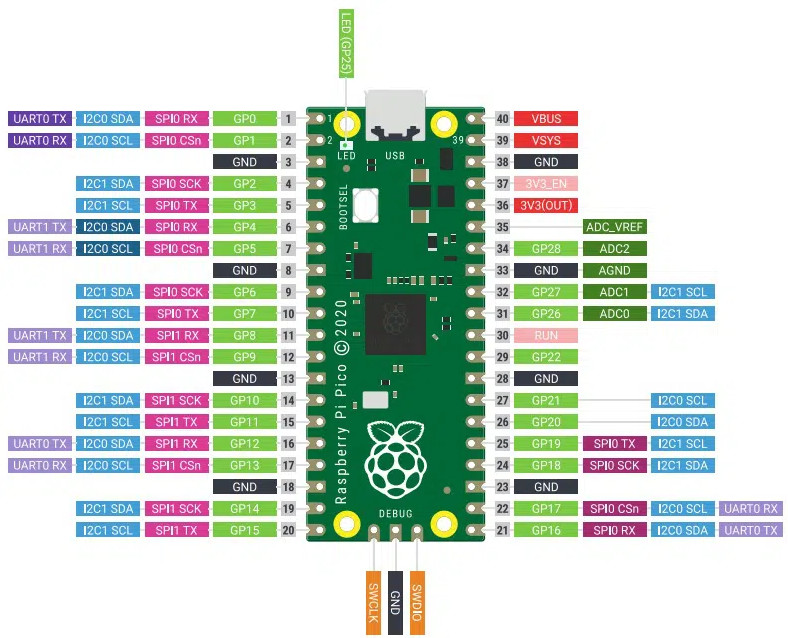
from machine import Pin

Pin(25, Pin.OUT)
from machine import Pin
Pin("LED", Pin.OUT)

As all the Raspberry Pis have the same pinout – here is a overview valid for all of them. Thank you pinout.xyz for your great service! The HDMI and USB ports are on the left, the SD card slot on top and the pins on the right.

Great microcontroller, bought it at az-delivery.de (no ref link). The onboard LED pin is 2 (GPIO 4).

Materials you need for this: LDRs (I am using 5528), breadboard, jumper wires, resistor (I used 56k) and a 5V power supply. The MicroPython code has been written for and tested on Pi Pico, Pi Pico W, D1 Mini and NodeMCU v3 ESP8266 .I bought it at berrybase.de and az-delivery.de (not referral links). The microcontrollers…

Coming from a Java background, I really wanted to and now I am enjoying to learn Python. It is refreshing to see the simplicity and extensive built-in functionality. As I like to see the code working I got me a Raspberry Pico with pins and a Picorino Unicorn hat with a 16×7 RGB LED field…
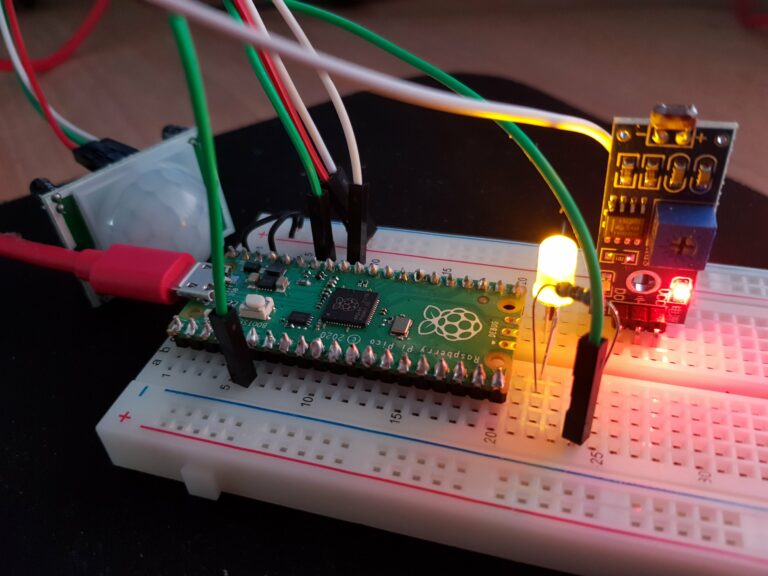
A small helper at night and a nice little excercise on the Pico: an LED that lights up when it is dark and something moves. I used a HC-SR501 as motion sensor, light sensor with digital output, a yellow LED of my Pico project complete kit (330 Ohm resistor with it) and of course the…
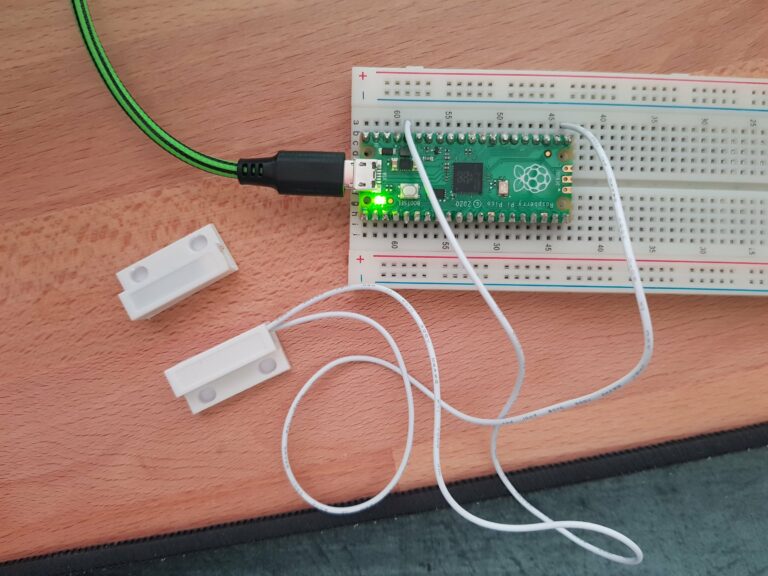
Jump to: Pico – D1 mini – Pi Zero Raspberry Pico A short Python implementation of a magnetic switch turning on a LED when it is not connected (e.g. window is opened). For simplicity reasons I used the builtin LED on the Pico. You have to use the pull=Pin.PULL_DOWN parameter for the input pin (sensor)….